"Landscape photography has actually been maxed out for years" - that's what the former equipment manager of our local photo club told me around 1990 - himself a lover of the infamous Cokin "tobacco gradient filter".
As a young photographer, I could hardly counter this with any arguments - but everything inside me resisted agreeing. I simply could not accept this statement in its generality.
I would never have dared to dream where my attitude would lead me many years later.
Panorama
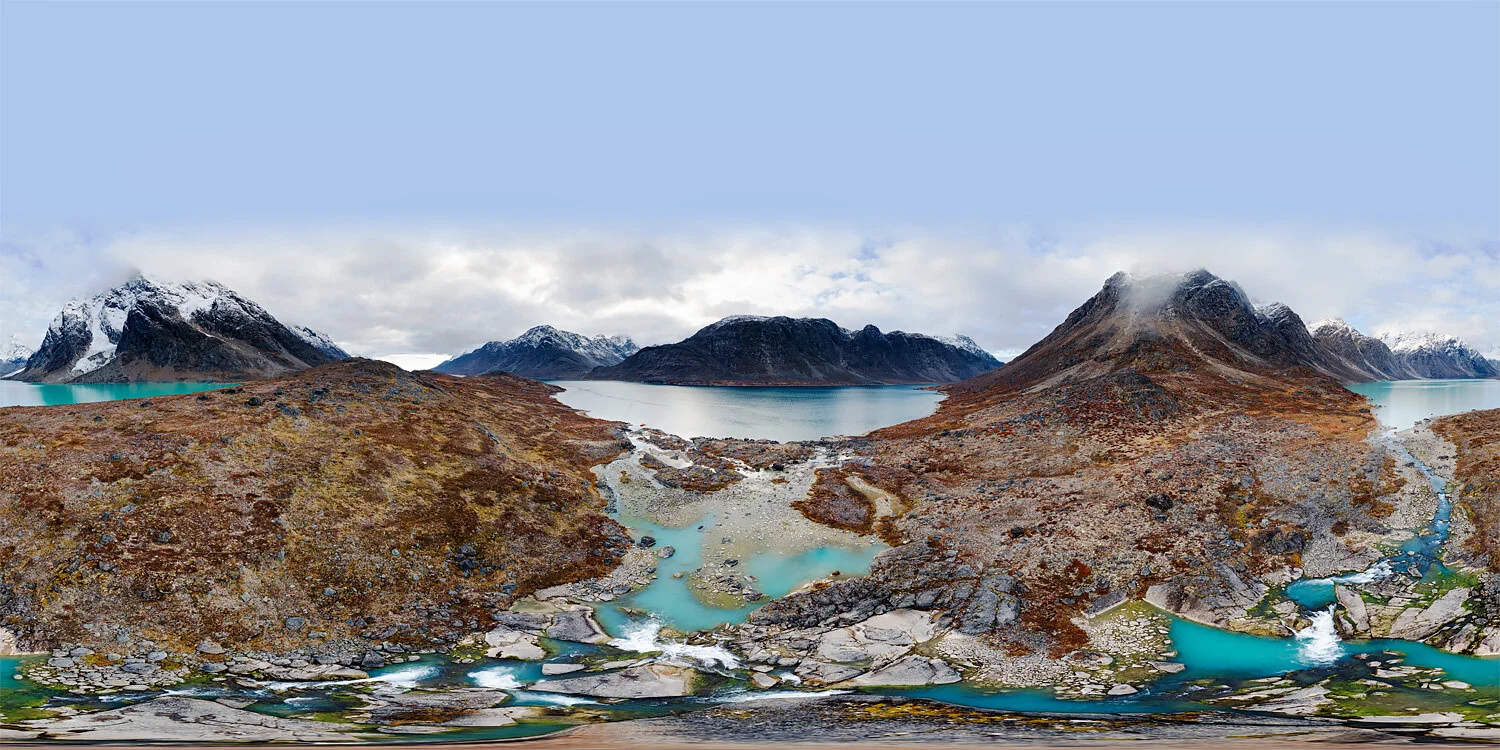
A lonely lake on a fjord in Greenland. 180° panorama, taken with DJI Mavic Air 2 and stitched from RAW files in PTGui.
Panorama photography with the DJI Mavic Air 2
Since I carry a DJI Inspire 2 Quadcopter in a large wheeled hardshell suitcase on most of my photographic trips, my standard luggage has grown to a weight of more than 65 kilos. Although the image quality of the APS-C sized sensor of the DJI Zenmuse X7 is in a class of its own, for the reasons of space and weight I'm always interested in the smaller options available on the market. In terms of packing size and weight, the first edition of the DJI Mavic Air was nothing but sensational. For my trip to Greenland in September 2020 the copter nerds from Globe Flight have given me the successor, called Mavic Air 2, for a thorough test.
The DJI Mavic Air 2, ready for takeoff (Photo: DJI)
First of all, with the tiny sensors of the small drones you of course have to be prepared for higher noise levels, but at least the Mavic Air 2 has a slightly larger sensor than the previous model (1/2" instead of 1/2.3") - and you don't have to take every picture with the intention of a large format fine art print. On the other hand, one thing in which the first Mavic Air already excelled, was automatic panorama shooting, which I think is an excellent way to get the most out of a small 12 megapixel sensor. This applies to both classic panoramic images (which simply show a larger section of the landscape than the angle of view of the lens allows) and digital image presentation forms such as interactive 360° spherical panoramas. By the way, Mavic Air 2's lens focal length is 24mm (in relation on 35mm "Full Frame") - in my opinion a very good all-round focal length for a drone. It is perfectly suited for creating panoramic shots.
There are four different types of panoramas that can be shot with the Mavic Air: Horizontal, vertical, 180° and the 360° sphere. You first determine the initial angle of view and then start the panorama shooting. The drone does the rest, and it is extremely quick and easy - hardly a minute passes from the pictures taken to the montage of the panoramic image as a JPEG file in the drone. The results of in-camera stitching are not bad, but not outstandingly good either. There occasionally are stitching errors - especially if you have moving elements in the overlapping field of view between the shots.
However, if you're willing to go few steps manually, you can achieve much better results. The real highlight of the drone's automatic panorama function is that it can save the RAW files (DNG) of the individual images parallel to the montaged panorama (must be activated first).
This results in the following workflow for me (here the example of a 360° panorama):
Recording of the panorama using the automatic function of the copter
Development of RAW files in Adobe Camera Raw (or Lightroom) with the focus on optimal technical reproduction of the tonal values (shadows, highlights)
Assembly of the panorama from the developed TIFF files in PTGui (using masks where necessary)
Editing of the mounted picture in Adobe Photoshop with regard to the aesthetics of the tonal values and colours, insertion of a "cap" (the copter can't photograph steeply upwards, so this gap in the picture can be closed in this step)
Creation of the interactive web version of the panorama using a suitable tool/viewer, currently my favourite tool is marzipano.
Another big advantage of the self-assembled images is that they use the maximum number of available pixels, thus offering a visibly higher resolution. A corresponding 360° panorama from PTGui is 18,486 x 9,243 pixels (W x H), whereas a file mounted in the drone has only 8,192 x 4096 pixels. In addition, DJI applies an unsolicited HDR function to the images during assembly to compensate for the contrasts. You my like this look - but it is definitely not my cup of tea.
Here are two examples of 360° spheres I photographed with the Mavic Air 2. I think the technical quality is impressive. With the Inspire 2, of course, I achieve even more detail resolution as well as more dynamic range in the shadows and highlights. Sensor size and resolution are irreplaceable. But compared to the size and weight of an Inspire 2, the performance of the Mavic Air 2 is simply amazing.
And while I'm about to praise this little drone - here are my 4 personal highlights from its use in Greenland:
Up to 35 minutes flight time per battery feels somehow endless.
The camera delivers excellent material for her size, up to 4K at 60 FPS.
The Copter flies absolute precisely and seems very responsive and controllable.
The whole system works absolutely smooth and trouble-free, there was no signal interference or other unexpected behaviour.

